Shop Wilson.com
How to Set Up the ATEC M3X 2.0

From box to practice-ready. Learn how to assemble your ATEC M3X 2.0 machine in minutes to get the most out of every practice with your team.
HOW TO ASSEMBLE THE ATEC M3X 2.0
- Assemble caddypod or tripod stand
The ATEC M3X 2.0 is available with either a wheeled caddypod, ideal for fastpitch softball or defensive baseball drills, or a stationary tripod stand, ideal for offensive baseball training. When unboxing the ATEC M3X 2.0, identify the components for your selected base. Push button spring clips within the steel tubes make it easy to assemble your wheeled caddypod or tripod stand. After setting the base, the no-nonsense receiver pin will be exposed to secure your M3X 2.0 pitching and training machine in place.

- Place the stand in your desired location. With a partner, place your M3X 2.0 on the stand.
When operating the M3X 2.0 on a tripod as a pitching machine, position the legs so that two are directed toward home plate and one is directed back toward the operator. Use a protective screen, like ATEC’s Lightweight Protective Screen, to safeguard the operator from batted balls.
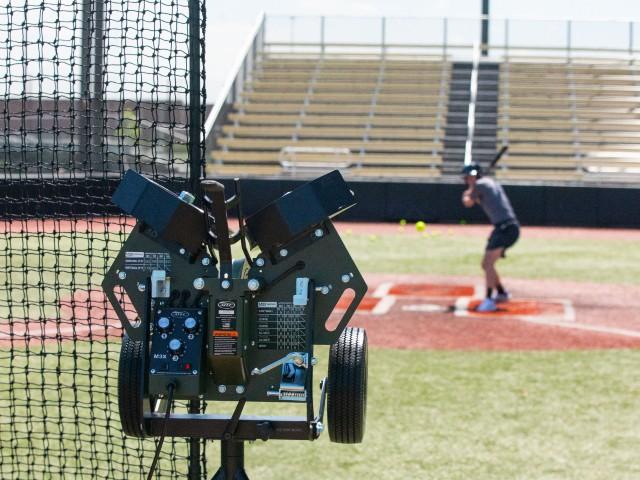
If you’re utilizing the M3X pitching machine for defensive drills or for softball practice, wheel the caddypod to the preferred location on the field. If preparing for batting practice, utilize a protective screen for operator safety.
To place your M3X 2.0 on the stand, lift the machine with a partner and place the base on the stand’s receiving pin.
- Tighten the horizontal adjustment handle
Turn the handle clockwise to secure the machine’s left/right orientation.

- Check that the On/Off switch is set to “Off” and plug your M3X 2.0 into a 110-volt power source.
Always use a grounded 110 Volt electric outlet when operating the M3X 2.0.
Turn the machine on and set speed control knobs to the desired speed setting.
HOW TO USE THE ATEC M3X 2.0
When ready to use your ATEC M3X 2.0 for batting practice or defensive drills, use the horizontal and vertical adjustment handles to aim and secure the machine at the desired pitch direction.
- Turn the machine on and set speed control knobs to the desired speed setting.
Refer to the Speed Chart on the back of the machine when setting speed controls. Wait for the motors to reach the proper speed before feeding a ball in the chute.
- Test the pitch location by feeding the ball into the chute.
Before anyone steps into the batter’s box, feed a single ball into the chute to test the location and speed. Confirm the pitch location multiple times before batters step into the batter’s box.

- Adjust as needed.
Use appropriate horizontal and vertical adjustment handles and speed control dials to adjust pitch types and velocities.
- Practice more efficiently than ever before
Easily update pitch types in batting practice, train ground ball drills, practice fly ball repetitions in the outfield and make the most of time with your team. The M3X 2.0 is the one machine that can do it all in a single training session.
HOW TO STORE THE ATEC M3X 2.0
When practice is over, store your M3X 2.0 upright in a temperate, dry climate. ATEC machine wheels are made of elastomeric urethane which maximize ball grip and overall machine performance. This material, by nature, is very pliable. To maintain optimum performance, never store or transport your machine laying down on its throwing wheels. Also, never store or transport your machine in an environment that exceeds 120°F.
To discover ATEC’s favorite training drills and learn more about your M3X 2.0 Pitching and Training Machine, visit the ATEC Blog and subscribe to ATEC Sports on YouTube.